Authentication
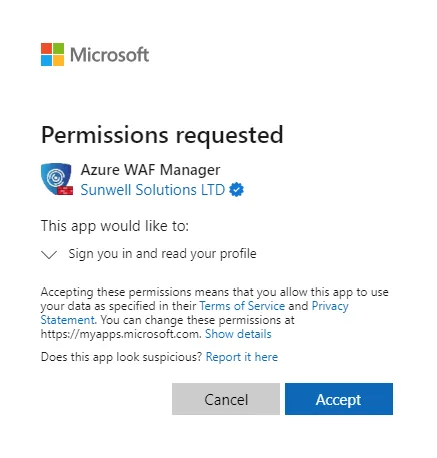
The first time you log in you will have to consent with our app to read your user profile data. Do not worry, we only ask for User.Read permissions and we read only your username.

NOTE: You can only log in with a Work or School Microsoft account.
Revoking access
If at some point you want to stop using our services, it is good practice to also revoke the User.Read access. You can do that by going to https://myapps.microsoft.com/, find the ManagedWAF app and revoke the access. If you don't consume our services, we won't use this access but we encourage best practices.
Organization
After a successful login, you need to create an "organization" with us. This is a logical group that we use internally. Call it a subscription or organization, they are very similar. It is the body that will hold your WAF Policies, Users, Service Principal, Limits and etc.
Log Analytics workspace
When you register for an organization with us, we will ask you to also give us the workspace id of the Log Analytics workspace that we will be using.
The general idea is the following:
- You send your Front Door or Application Gateway WAF Logs to a Log Analytics workspace in your environment
- You register the workspace id (so we know it) under your newly created organization with us
- Provide us access to it, so we can display you the WAF logs through our portal
NOTE: You can only register one workspace id. This means that if you are not sending all your WAF logs to this workspace id, you should consider doing it. If not, the only logs you will be seeing through our services are going to be the logs that reside in this paricular workspace.
Logs Setup
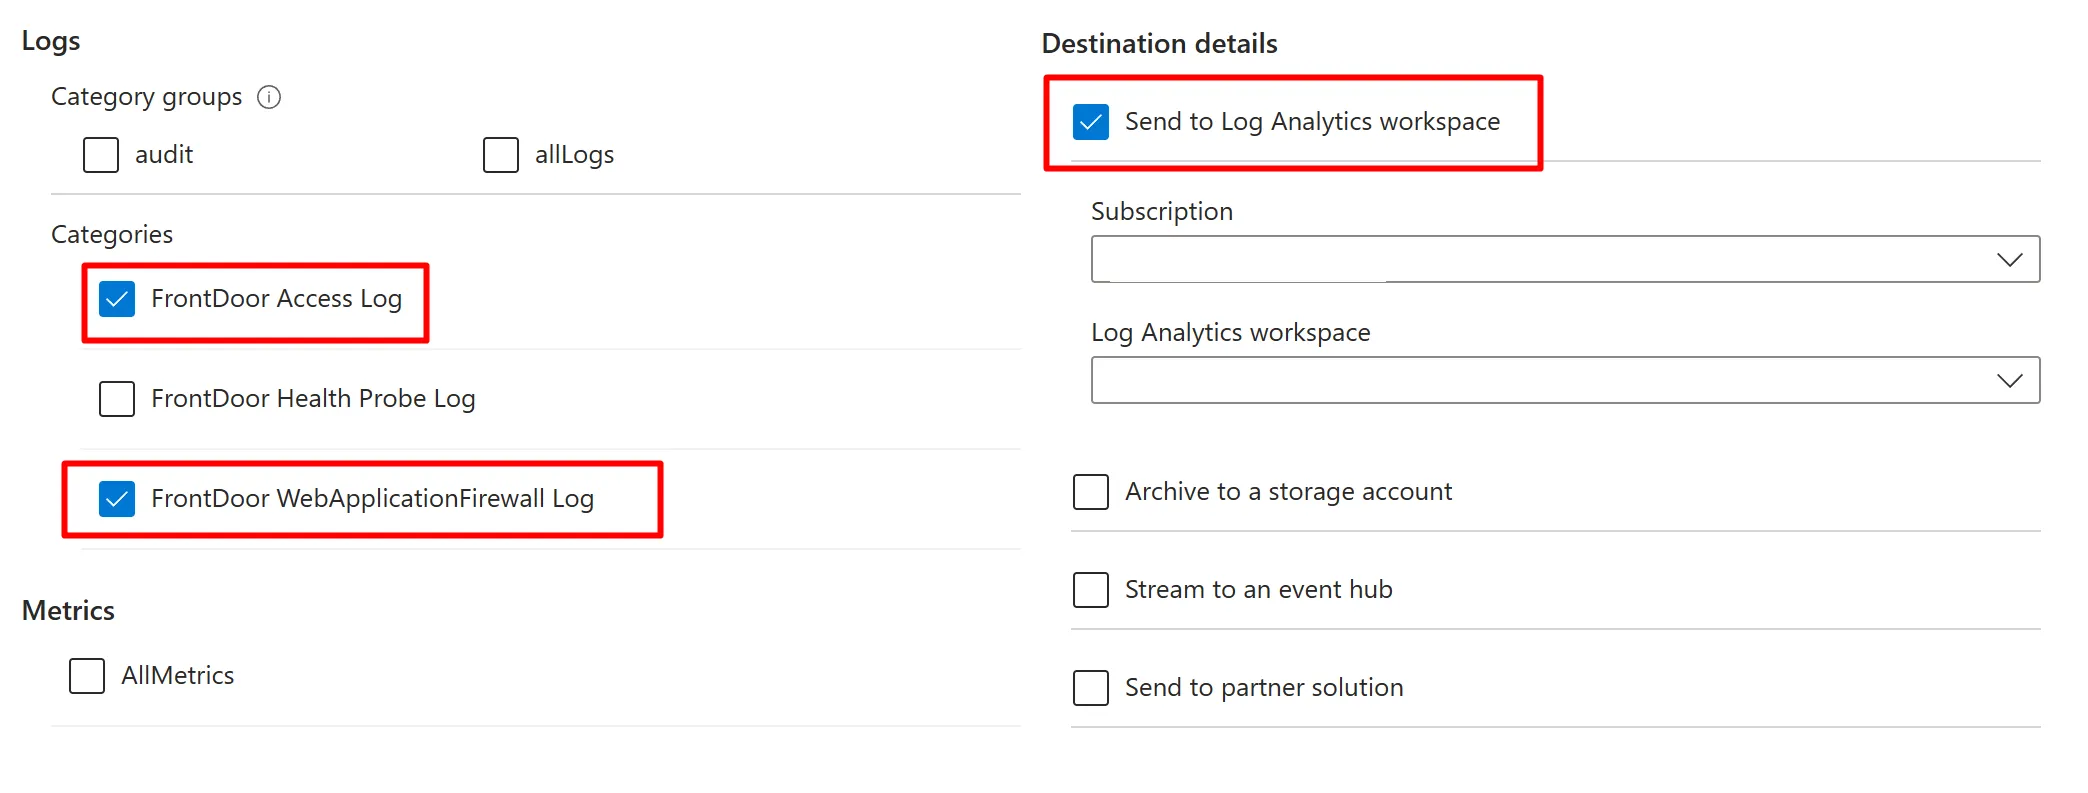
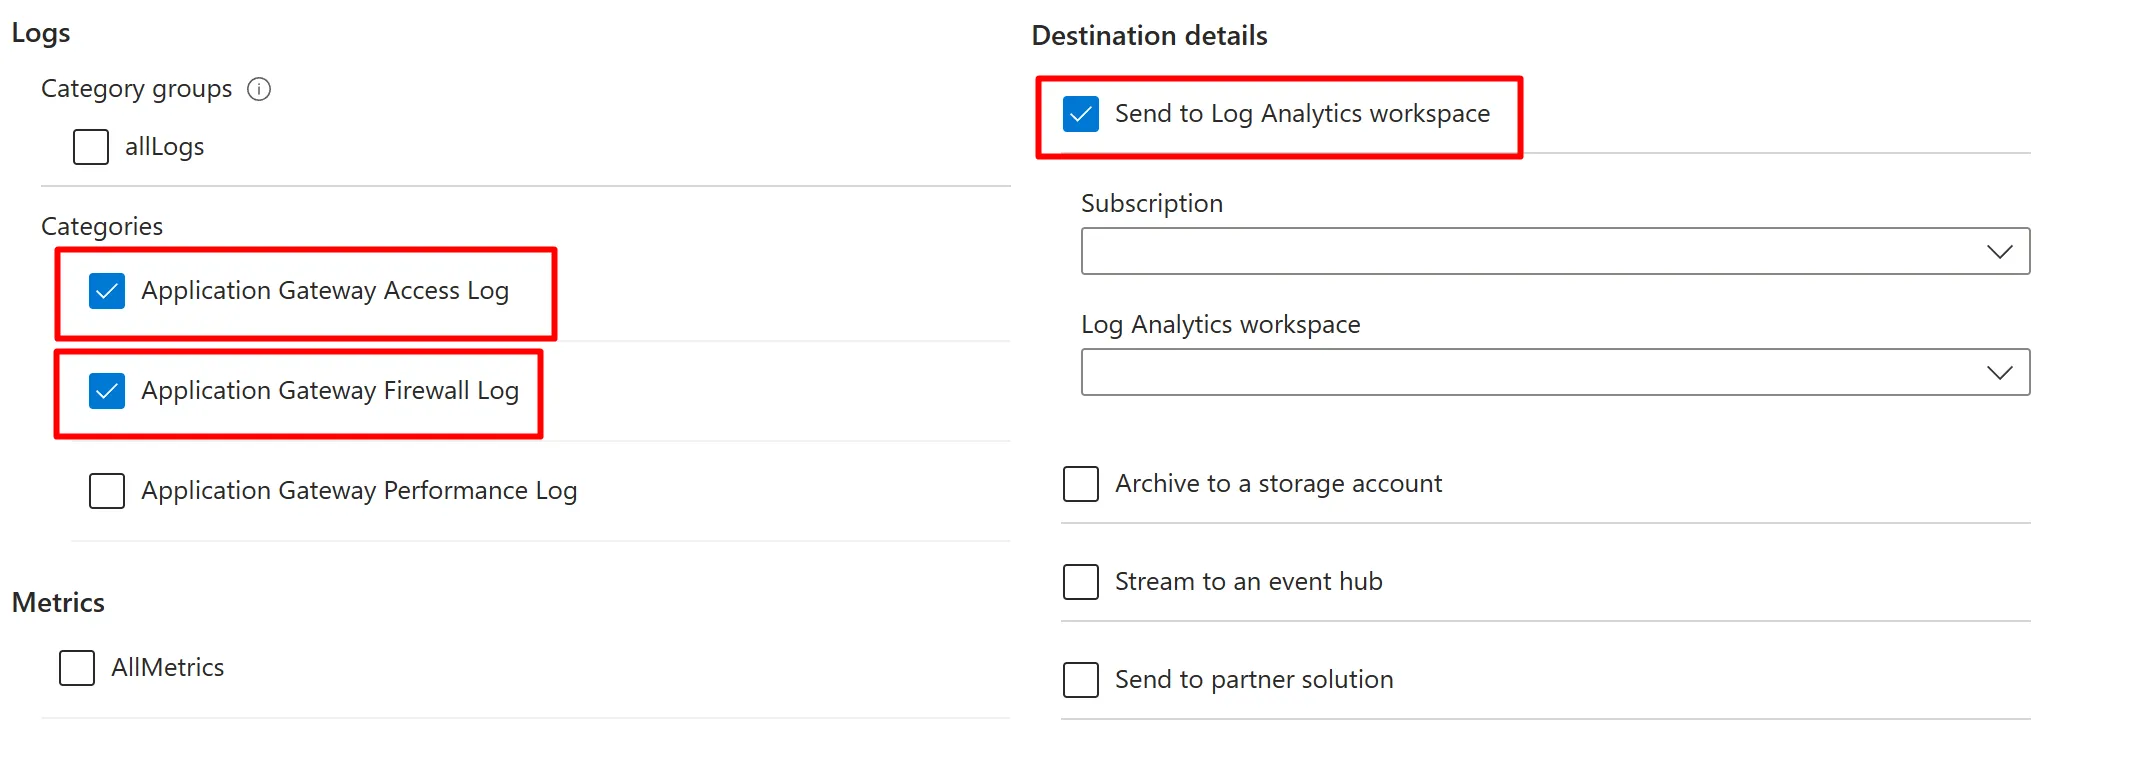
First of all, you need to make sure that you are sending both Access and Firewall logs to the same log analytics workspace that you will provide us access to and have registered with us when you created the organization.
This is done by going to the Diagnostic setting on the Front Door or Application Gateway and set up log forwarding.
Front Door:

Application Gateway:

NOTE: Make sure that you are sending them to the same Log Analytics workspace you provide when registering an Organization with us
Granting Azure WAF Manager Access
In order for us to reach your WAF Logs, we need a Read-only access to your Log Analytics workspace where you send your WAF logs. There are a couple of ways to do this but we have chosen the most modern and clean approach - Azure Lighthouse. There are two ways of granting us access via Azure Lighthouse. Grant access to subscription or resource group. Of course we encourage you to follow the least priviledge way which is granting us access to the resource group in which the Log Analaytics workspace resides. At this stage there is no way of granting access ONLY to a single resource.
To grant us access via Azure Lighthouse, you can choose one of the two ARM Templates we have ready for you. There are super-easy few-click setups.
Azure Lighthouse Resource Group
This template will provide us with Log Analytics Reader role over the resource group in quesiton.

or copy link
https://portal.azure.com/#create/Microsoft.Template/uri/https%3A%2F%2Fraw.githubusercontent.com%2FSunwell-Solutions-LTD%2Fazure-waf-manager-arm-templates%2Fmain%2Fawm-azure-lighthouse-resourcegroup.json
Azure Lighthouse Subscription
This template will provide us with LogAnalytics Reader role over the subscription in quesiton

or copy link
https://portal.azure.com/#create/Microsoft.Template/uri/https%3A%2F%2Fraw.githubusercontent.com%2FSunwell-Solutions-LTD%2Fazure-waf-manager-arm-templates%2Fmain%2Fawm-azure-lighthouse-subscription.json
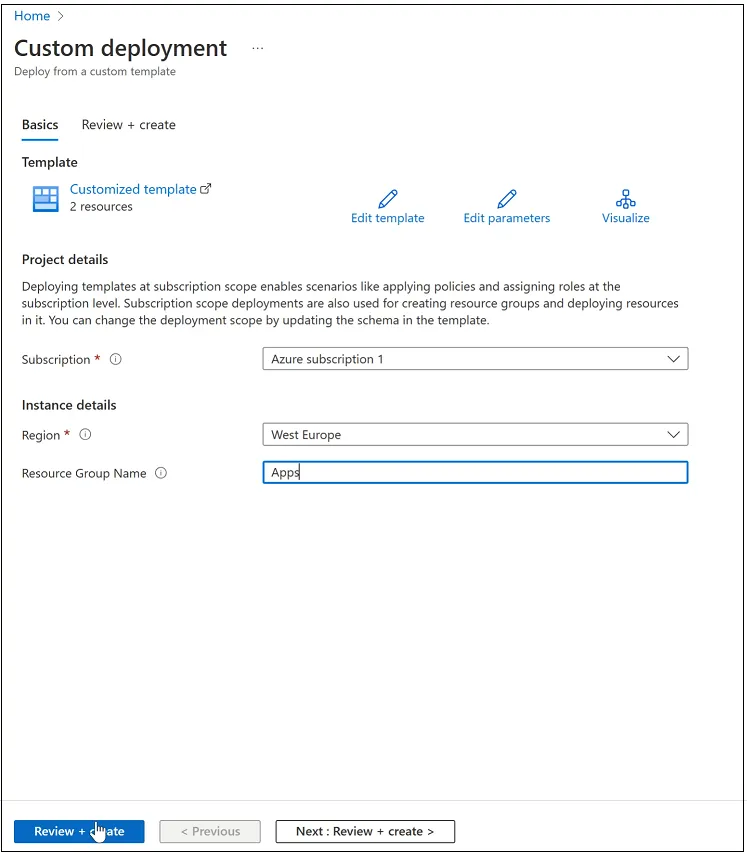
The deployment looks like this (Resource group choice). Just select the subscription and then the resource group in which the Log Analytics workspace resides.

Once this is deployed, go to Azure Lighthouse, then Service Providers and select Service provider offers. There you should see us. The name of the Offer is Managed Azure WAF. Browse it to see details and the role assignments. Here is how it should look like:

We only get Log Analytics Reader role and nothing else.
Revoking Access
To fully revoke our access, you can delete our entire service provider offer from the Service provider offers blade in Azure Lighthouse, there is a delete button where you can easily revoke the access.

If you want to keep our service provider offer but only remove the specific Log Analytics Reader role to the subscription/resource group, go to Delegations instead and delete the delegation from there.
Adding WAF Policies
Now that you have taken care of the logs access, it's time to add WAF Policies to our portal. Go to Organizations -> WAF Policies. Add the WAF policies you want to manage there. The info we require per WAF Policy is the following:
- WAF Policy name
- Subscription id
- Resource Group
- Type
We need this info so we can call the Azure REST API when we need to fetch the WAF Policy object.
If you have finished the steps until now you should be able to go to Dashboard and look at WAF Logs.
Service Principal
We can not only display WAF logs but we can whitelist parameters directly form the log view. However, we cannot do this with the access we have until now, which is Log Analytics Reader. In order to make changes to a WAF Policy we would need Contributor role on each WAF policy you want to manage through our portal. Here is how to do it.
Create Service Principal
Go to your Azure Portal and navigate to Azure Active Directory and then App registrations. Create a New registration. Give it an appropriate name (WAFManager is cool) and click Register.
NOTE: App Registration and Service Principal are interchangeble here
Now open the newly created Service Principal and navigate to Certificates & Secrets. Create a new Client secret. The value will only be shown once so record it.
Return to our portal under Organization (best in an already opened tab or a new tab so you can copy the info). Add the details of the newly created Service Principal. Apart from the secret, all the required details are in the Overview blade of the Service Principal.
Now go to all of the WAF Policies you have added or plan to add in our portal and give Contributor role to the Service Principal.
That's it! You should be able to fully consume our services now.
Congratulations and Enjoy!
Previous - Go to - Overview
Next Go to - How it works